Configure TrueNas Scale 🖥 for a UPS 🔋
Power outages are very rare, especially in Germany 🇩🇪. But if they do happen, I don’t want to risk loosing my data after a corrupted VDEV. So I thought, I would get a cheap UPS with a backup battery. It should just last long enough to give the server time to shut down properly.
Hardware setup
- Bluewalker USV Powerwalker VI 650 SB LI (link) with a USB connector
- OS: TrueNas Scale
TrueNAS-SCALE-22.02-RC.2 - 🖥 Server: 32GB DDR4-ECC RAM, 8-core Intel(R) Xeon(R) CPU E5-2620 v4 @ 2.10GHz. See more details in this post.
I connected the power cable of the server to the rear plug on the UPS. Then I connected the USB cable to the rear of the UPS and hooked it into the server.
Software setup
This really wasn’t as easy as I had hoped. I knew before buying that particular UPS, that it wasn’t listed in the supported driver list in the TrueNas interface. Hence, I expected that some tinkering would be necessary. But not that it would get that hard 😰.
The main goal is to get the OS (TrueNas Scale in this case) to get notified if the supply state changes and take action. This is a configuration task. I want my NAS to shutdown once the UPS has to supply the energy from it’s battery 🔋.
This configuration is done through the UPS Service in the admin Web-UI.
Finding the right driver
The first challenge was to find the right driver.
I thought I had to look for a driver that contains PowerWalker in its name, because my product also contained it.
That didn’t work though.
My next hypothesis was that I might have configured the Port or Hostname incorrectly.
To know how and where my UPS was connected through USB, I enlisted the help of lsusb.
This CLI-tool is sadly not installed by default on TrueNas Scale.
sudo apt install usbutils
lsusb
The output of that showed me
Bus 002 Device 002: ID 0764:0601 Cyber Power System, Inc. PR1500LCDRT2U UPS
among other things.
So apparently, at least the USB interface of that UPS identifies itself as Cyber Power System, also with a identifier (PR1500LCDRT2U).
Another clue was the output of nut-scanner:
$ nut-scanner
Neon library not found. XML search disabled.
Scanning USB bus.
No start IP, skipping SNMP
No start IP, skipping NUT bus (old connect method)
Scanning IPMI bus.
[nutdev1]
    driver = "usbhid-ups"
    port = "auto"
    vendorid = "0764"
    productid = "0601"
    bus = "002"
That at least told me that the driver was usbhid-ups and not blazer_usb (which I initially read a lot in forums).
With this information, I picked the following driver: Cyber Power Systems ups 2 Value 1500ELCD-RU USB (usbhid-ups).
That didn’t work either (still).
Looking at /etc/nut/ups.conf, I saw:
[ups]
    driver = usbhid-ups
    port = auto
    desc = ""
This was missing the additional information that nut-scanner had provided me with about vendorid, productid, and the bus.
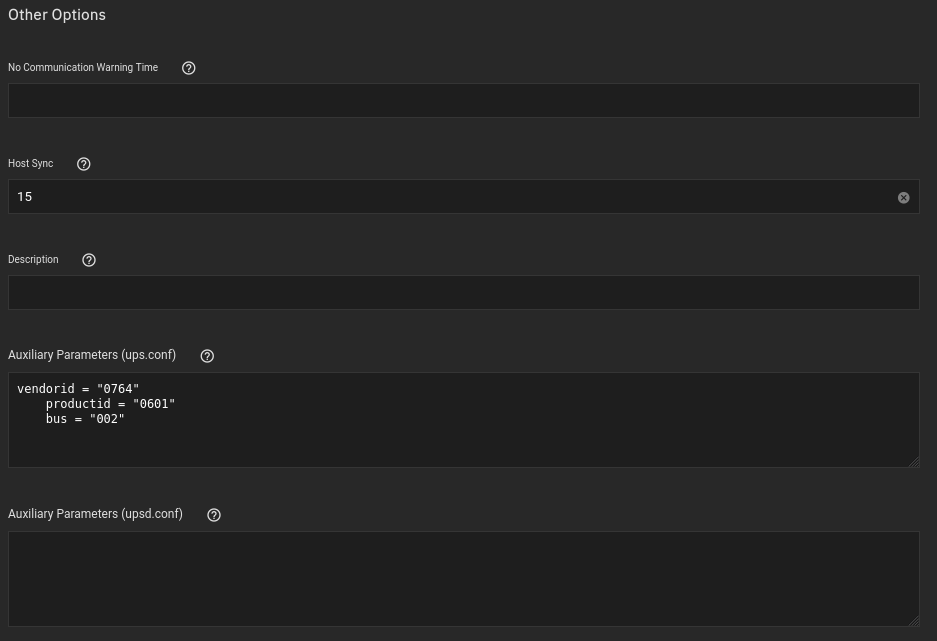
So I added those three lines to the Auxiliary Parameters (ups.conf) section in the WebUI.
Aaaaand …. it worked 🚀🎉✅.
This is my final configuration now:
- General settings:
 Where the
 passworduses the default value offixmepass. However, I think any other password would also have worked. - Other settings: